Houseplants bring life, beauty, and a touch of nature indoors, but like all living things, they require proper care and attention. One essential aspect of houseplant care is repotting. Repotting not only refreshes the soil and provides your plants with the space they need to thrive but also allows you to inspect their roots and ensure their overall health. In this article, we will explore the art of repotting house plants, covering when, why, and how to repot, as well as some essential tips to ensure your plants continue to flourish.
Why Repotting Is Important
Root Health
Over time, houseplants outgrow their containers, and their roots become root-bound, meaning they wrap around themselves, restricting growth. Repotting allows the roots to spread out and access fresh nutrients.
Soil Refresh
The nutrients in potting soil can become depleted over time, affecting your plant's growth. Repotting gives you the chance to replace old soil with a fresh mix, ensuring your plant has access to the necessary nutrients.
Pest and Disease Prevention
Repotting provides an opportunity to inspect the root system and the plant's overall health. This can help you detect and address any pest or disease issues early, preventing them from spreading.
When to Repot
Determining when to repot your houseplants depends on several factors:
Root Bound
If you notice roots circling around the root ball and filling the pot, it's time to repot. Generally, this occurs every 1-2 years for most plants.
Slow Growth or Wilting
If your plant's growth has slowed, or it wilts soon after watering, it might be root-bound or suffering from nutrient depletion.
Roots Emerging from Drainage Holes
If you see roots growing out of the pot's drainage holes, your plant is likely cramped and in need of a larger home.
Bulging or Cracking Pot
If the pot is visibly deforming due to root pressure, it's a clear sign your plant needs a bigger container.
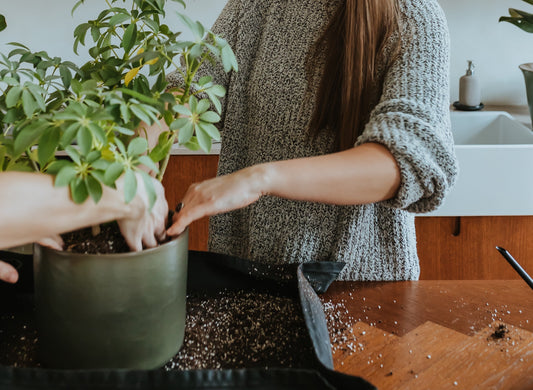
How to Repot Your Houseplants
- Choose the Right Pot: Select a pot that is 1-2 inches larger in diameter than the current one. Ensure it has drainage holes to prevent overwatering.
- Gather Supplies: You'll need fresh potting soil, a trowel or scoop, and a saucer to catch excess water.
- Prepare the New Pot: Cover the drainage hole with a shard of pottery or a recycled piece of screen, then fill the bottom of the new pot with a layer of fresh potting soil. This provides a foundation for the plant.
- Remove the Plant: Gently tap the pot's sides to loosen the plant. Carefully slide the plant out, supporting the base of the stem, and gently tease apart the roots.
- Inspect and Trim: Examine the roots for signs of damage, rot, or pests. Trim away any dead or unhealthy roots with clean, sharp scissors or pruning shears.
- Place in New Pot: Position the plant in the center of the new pot and fill in around it with fresh potting soil. Firmly press the soil down to eliminate air pockets.
- Water Thoroughly: After repotting, water your plant thoroughly to settle the soil and hydrate the roots. Be sure to let excess water drain away.
- Prune and Clean: If your plant has overgrown or damaged foliage, now is a good time to prune it back and wipe down leaves to remove dust.
- Monitor and Adjust: Keep an eye on your repotted plant in the following weeks to ensure it adjusts well to its new home. Be cautious not to overwater during this period.
Repotting house plants is an essential aspect of their care, promoting healthy growth and preventing issues associated with cramped root systems and depleted soil. By recognizing the signs that it's time to repot and following the proper techniques, you can ensure your indoor greenery thrives, bringing beauty and vitality to your living spaces for years to come. Remember, repotting is not just an act of maintenance; it's an investment in the well-being of your beloved houseplants.